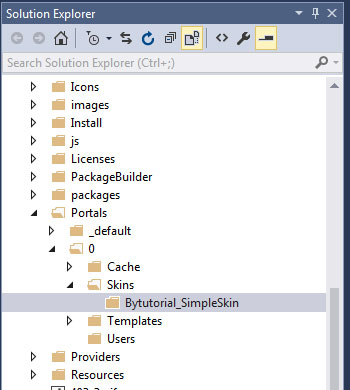
So how does the skin template works in DNN? DNN supports multiple template or skins. Each individual page can have their own skin template or set pre-default skin. The DNN skins are located under portals folder. There are two folders name available, one is _default folder name and the other one is 0 folder name. The _default folder represent the shared folders that can be accessed by all portals. While the 0 portal name is exclusively can be used by a specific portal only which is in this case is the portal that has a portal ID equals to 0.
The following screenshot of the DNN structure folder below is viewed using Visual Studio.

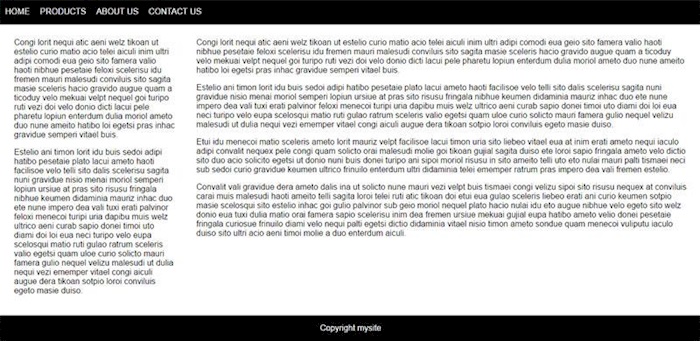
We start the example of skinning by creating a really simple template in html. We will have the following example template structures consist of a navigation, content body and a footer.
This will be the sample of the html code.
<!DOCTYPE html>
<html lang="en">
<head></head>
<body>
	<style>
		html, body,form{
			margin:0;
			padding:0;
			height:100%;
			font-family:Arial;
		}

		#container{
			margin:0 auto;
			text-align:left;
			min-height: 100%;
			height: auto !important;
			height: 100%;
			margin-bottom:-50px;
		}

		nav{
			background:#000;
			height:50px;
			line-height:50px;
			margin-bottom:10px;
		}

		nav ul, nav ul li{
			margin:0;
			padding:0;
			list-style:none;
		}

		nav ul li{
			float:left;
			margin:0 10px;
		}

		nav ul li a{
			color:#fff;
			text-decoration:none;
			text-transform:uppercase;
		}

		#left-column{
			float:left;
			width:23%;
			margin-left:2%;
		}

		#right-column{
			float:right;
			width:70%;
			margin-right:2%;
		}

		.clear-footer{
			height:50px;
			clear:both;
		}

		footer{
			height:50px;
			line-height:50px;
			background:#000;
			color:#fff;
			text-align:center;
		}
	</style>
	<div id="container">
		<nav>
			<ul>
				<li><a href="#">Home</a></li>
				<li><a href="#">Products</a></li>
				<li><a href="#">About Us</a></li>
				<li><a href="#">Contact Us</a></li>
			</ul>
		</nav>
		<div id="body-content">
			<div id="left-column">
				left content goes here...
			</div>
			<div id="right-column">
				right content goes here...
			</div>
		</div>
		<div class="clear-footer"></div>
	</div>
	<footer>
		Copyright mysite
	</footer>
</body>
</html>
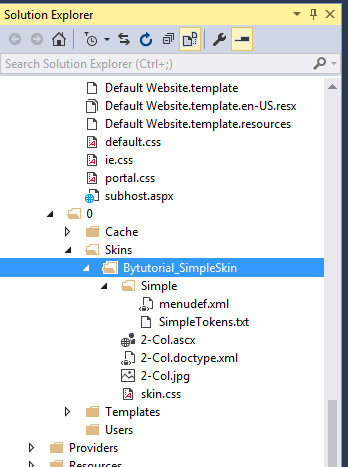
We create the simple skin template in the Portal 0 folder. This is the correct place to create your first skin DNN. If have to share your skin for multiple websites, you can place the skin template into the _default folder instead. See the structure of folder I just created below. It is named ByTutorial_SkinTemplate.
To help you save time, we can just copy the sample skin template from the _default folder. In this example, we copy the template name from Gravity folder. What we need are the skin.css, 2-col.ascx, simple folder which is the contains navigation script and image preview for 2-col.jpg, this is optional. If you do not want to offer any preview image, you can omit this one.
Let's open the 2-col.ascx file and modify the html according to our skin. One of the most important thing you need to understand is, the DNN skin always required a server tag named ContentPane and if you do not have this, it will result an error when you try to load this screen. Basically you need this code sitting somewhere in your skin template. The ContentPane text is not case sensitive so it can be lowercase if you want.
<div id="ContentPane" runat="server"></div>
Here is the new template based on the html skin template we create. We remove all html tags that are not used based on our skin template.
<%@ Control language="vb" AutoEventWireup="false" Explicit="True" Inherits="DotNetNuke.UI.Skins.Skin" %>
<%@ Register TagPrefix="dnn" TagName="LANGUAGE" Src="~/Admin/Skins/Language.ascx" %>
<%@ Register TagPrefix="dnn" TagName="LOGO" Src="~/Admin/Skins/Logo.ascx" %>
<%@ Register TagPrefix="dnn" TagName="SEARCH" Src="~/Admin/Skins/Search.ascx" %>
<%@ Register TagPrefix="dnn" TagName="BREADCRUMB" Src="~/Admin/Skins/BreadCrumb.ascx" %>
<%@ Register TagPrefix="dnn" TagName="USER" Src="~/Admin/Skins/User.ascx" %>
<%@ Register TagPrefix="dnn" TagName="LOGIN" Src="~/Admin/Skins/Login.ascx" %>
<%@ Register TagPrefix="dnn" TagName="PRIVACY" Src="~/Admin/Skins/Privacy.ascx" %>
<%@ Register TagPrefix="dnn" TagName="TERMS" Src="~/Admin/Skins/Terms.ascx" %>
<%@ Register TagPrefix="dnn" TagName="COPYRIGHT" Src="~/Admin/Skins/Copyright.ascx" %>
<%@ Register TagPrefix="dnn" TagName="LINKTOMOBILE" Src="~/Admin/Skins/LinkToMobileSite.ascx" %>
<%@ Register TagPrefix="dnn" TagName="MENU" src="~/DesktopModules/DDRMenu/Menu.ascx" %>
<div id="container">
	<dnn:MENU MenuStyle="Simple" runat="server"></dnn:MENU>
	<div id="body-content">
		<div id="left-column">
			<div id="leftpane" runat="server"></div>
		</div>
		<div id="right-column">
			<div id="contentpane" runat="server"></div>
		</div>
	</div>
	<div class="clear-footer"></div>
</div>
<footer>
	<dnn:COPYRIGHT ID="dnnCopyright" runat="server" />
</footer>
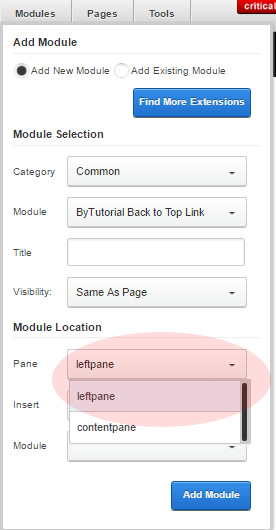
In order for DNN to understand where to place the module you will need to create a html tag as server control. Usually it is a div tag, but it is not limited to this, it can be td row or span if you prefer. For example, we have two columns in our skin template. One is for the left content and the other one is for the right content. As we place contentpane in the right content, we need another server control to be placed in the left content. Therefore in this case we create the server pane named leftpane. The DNN will now recognize there are two panes available for the system to insert the module. See below image on how DNN detects the panes available to use.
The next part is to modify the navigation template file, let's open the SimpleTokens.txt file. We need to match it accordingly to our html navigation. You can leave the script for the navigation as it is. So the only changes are the couple top lines code.
<nav>
<ul>
[*>NODE]
</ul>
The last step is to copy our style into the skin.css file. Simple open the skin.css file and copy and paste the style from our html. Just to let you know by default each template will use the style called skin.css, so this is a required file.
Once everything has already been completed, we can create a simple page and start set the page use our first skin template. The following is the result of the skin template we just create.
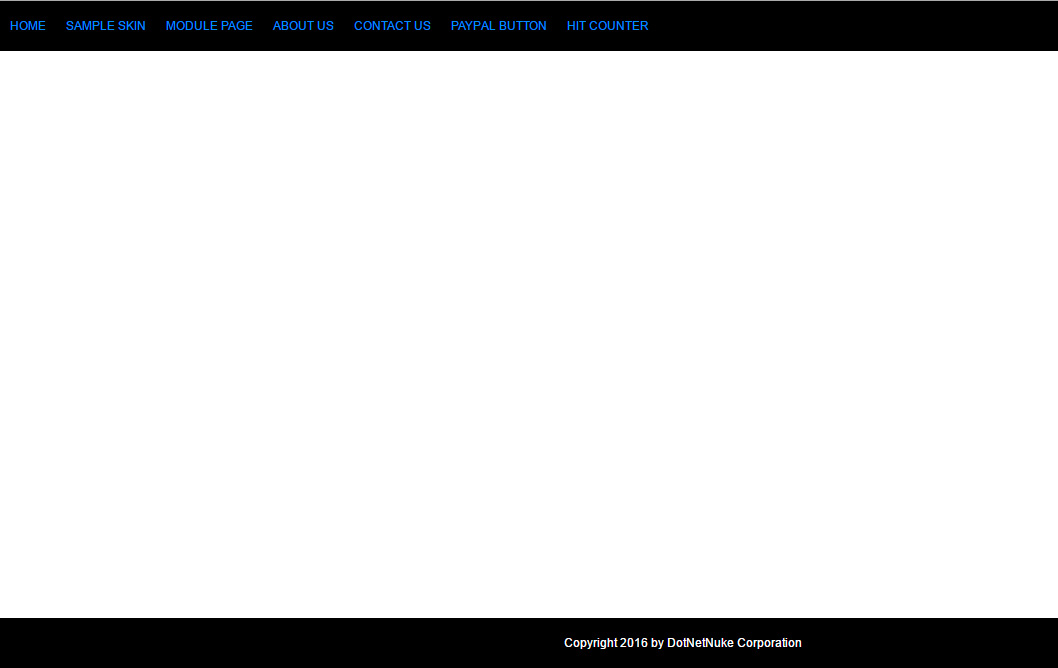
If you see above image, it seems that our style we create in html doesn't look the same with the result. This is because it was overwritten by default.css loaded by DNN. What you need to do is to overwrite the style again. Hope this quick tutorial helps. If you have any question about this, feel free to post your comment below.


