This is the second part tutorial of our first ebook cordova tutorial. If you miss the first part of the tutorial, I would recommend you to read the first tutorial before continue reading this article. You can click the following link to read the first tutorial.
https://bytutorial.com/blogs/cordova/create-your-ebook-android-apps-using-cordova
As I promised, in this tutorial, you will learn how to package your ebook app into .apk file. The first thing you have to do is to configure your application configuration setting xml file. This configuration information is used by Cordova to package your application. The configuration xml file is located under the root folder named config.xml. If you open your config xml file using any text editor, you will have the following information.
<widget id="com.bytutorial.ebooktutorial" version="1.0.0" xmlns="http://www.w3.org/ns/widgets" xmlns:cdv="http://cordova.apache.org/ns/1.0">
    <name>ByTutorial EBook</name>
    <description>
        A sample ebook provided by tutorial.com
    </description>
    <author email="bytutorial.com@gmail.com" href="https://bytutorial.com">
        Andy Suwandy
    </author>
    <content src="index.html" />
    <platform name="android">
        <icon density="ldpi" src="www/res/icon/android/icon-ldpi.png" />
        <icon density="mdpi" src="www/res/icon/android/icon-mdpi.png" />
        <icon density="hdpi" src="www/res/icon/android/icon-hdpi.png" />
        <icon density="xhdpi" src="www/res/icon/android/icon.png" />
        <icon density="xxhdpi" src="www/res/icon/android/icon-xxhdpi.png" />
        <icon density="xxxhdpi" src="www/res/icon/android/icon-xxxhdpi.png" />
    </platform>
    <access origin="*" />
    <allow-intent href="http://*/*" />
    <allow-intent href="https://*/*" />
    <allow-intent href="tel:*" />
    <allow-intent href="sms:*" />
    <allow-intent href="mailto:*" />
    <allow-intent href="geo:*" />
    <platform name="android">
        <allow-intent href="market:*" />
    </platform>
    <platform name="ios">
        <allow-intent href="itms:*" />
        <allow-intent href="itms-apps:*" />
    </platform>
    <engine name="android" spec="^6.2.3" />
    <plugin name="cordova-plugin-whitelist" spec="^1.3.2" />
</widget>
Those are the following information you will need to change. They are listed as below:
The ID of your application has to be unique. Usually developers will name the application id using their domain company site name. This is optional, but it is truly recommended as it is easy to identify and definitely quite unique. In this example, I named my ebook application as com.bytutorial.ebooktutorial.
2. Version of your app.
The first initial version of your app should be 1.0.0. If you release an update, do not forget to increment the version of your app.
3. Name of your application
The name of your application can be generic word text describes the your application title. For example in this case, I named it ByTutorial Ebook.
4. Description of your application
Describe in short description what is your application used for.
5. Create an icon of your app.
If you google and type in Generate android icon app, you should be able to see some free sites offering free android app icon generator. What you need to do is to supply your large icon image and upload it to the sites and it will generate the icons automatically for you. Once the icons have been generated, you will need to map the icon path location according to the pixel density. The following are the size of the icons dimension.
| Type | Dimension (pixels) |
| ldpi | 36 x 36 |
| mdpi | 48 x 48 |
| hdpi | 72 x 72 |
| xhdpi | 96 x 96 |
| xxhdpi | 152 x 152 |
| xxxhdpi | 192 x 192 |
If you want to have a splash screen, you will need to install a splash screen plugin. To install the plugin, please go to your NodeJs console and type in the following command.
cordova plugin add cordova-plugin-splashscreen
Once the plugin has been installed, you should see a new plugin splash screen has been added into the config file like below.
<plugin name="cordova-plugin-splashscreen" spec="^3.2.2" />
And under the android platform in config.xml, you will see there is a section for splash screen for you to map the images.
<platform name="android">
	<icon density="ldpi" src="www/res/icon/android/icon-ldpi.png" />
	<icon density="mdpi" src="www/res/icon/android/icon-mdpi.png" />
	<icon density="hdpi" src="www/res/icon/android/icon-hdpi.png" />
	<icon density="xhdpi" src="www/res/icon/android/icon.png" />
	<icon density="xxhdpi" src="www/res/icon/android/icon-xxhdpi.png" />
	<icon density="xxxhdpi" src="www/res/icon/android/icon-xxxhdpi.png" />
	<splash density="land-ldpi" src="www/res/screen/android/screen-ldpi-landscape.png" />
	<splash density="land-mdpi" src="www/res/screen/android/screen-mdpi-landscape.png" />
	<splash density="land-hdpi" src="www/res/screen/android/screen-hdpi-landscape.png" />
	<splash density="land-xhdpi" src="www/res/screen/android/screen-xhdpi-landscape.png" />
	<splash density="land-xxhdpi" src="www/res/screen/android/screen-xxhdpi-landscape.png" />
	<splash density="land-xxxhdpi" src="www/res/screen/android/screen-xxxhdpi-landscape.png" />
	<splash density="port-ldpi" src="www/res/screen/android/screen-ldpi-portrait.png" />
	<splash density="port-mdpi" src="www/res/screen/android/screen-mdpi-portrait.png" />
	<splash density="port-hdpi" src="www/res/screen/android/screen-hdpi-portrait.png" />
	<splash density="port-xhdpi" src="www/res/screen/android/screen-xhdpi-portrait.png" />
	<splash density="port-xxhdpi" src="www/res/screen/android/screen-xxxhdpi-portrait.png" />
	<splash density="port-xxxhdpi" src="www/res/screen/android/screen-xxxhdpi-portrait.png" />
</platform>
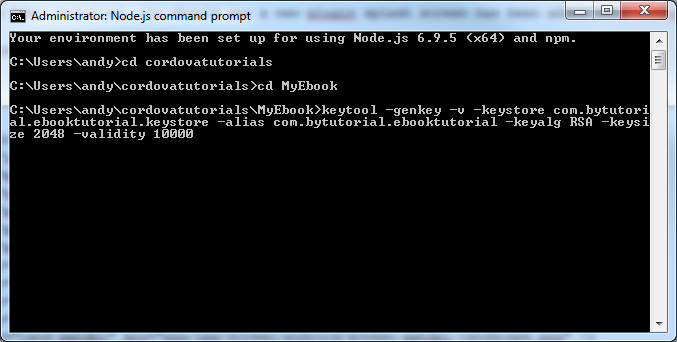
The next step is to create your sign key. Please remember you have to keep the sign key safely, once you have published your app and you accidentally lost the key, you are no longer able to publish the app. As every time you publish an app, a sign key is required. To create your own key, please use the following command.
keytool -genkey -v -keystore com.bytutorial.ebooktutorial.keystore -alias com.bytutorial.ebooktutorial -keyalg RSA -keysize 2048 -validity 10000
For this example, I will use the following command to create my app key.
keytool -genkey -v -keystore com.bytutorial.ebooktutorial.keystore -alias com.bytutorial.ebooktutorial -keyalg RSA -keysize 2048 -validity 10000
If you get the following error "'keytool' is not recognized as an internal or external command, operable program or batch file" when you try to run above command. Please read the following article where you basically need to map the path of sdk java globally.
https://bytutorial.com/blogs/cordova/keytool-is-not-recognized-as-an-internal-or-external-command-operable-program-or-batch-file
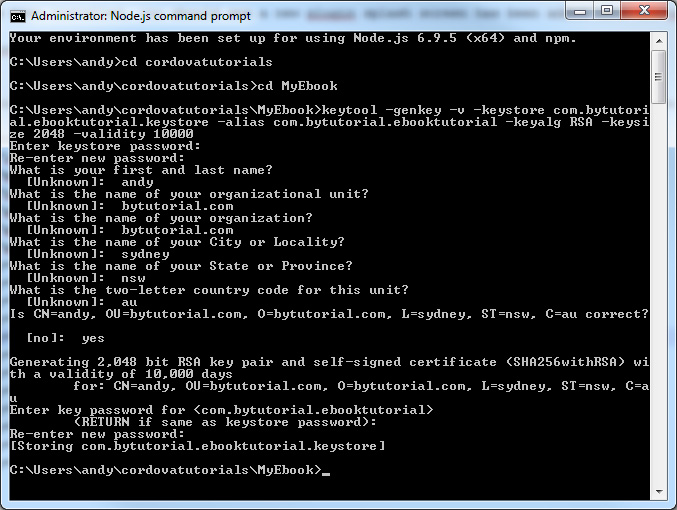
If the command runs perfectly, you will be then requested to enter your sign key password and answer some questions.
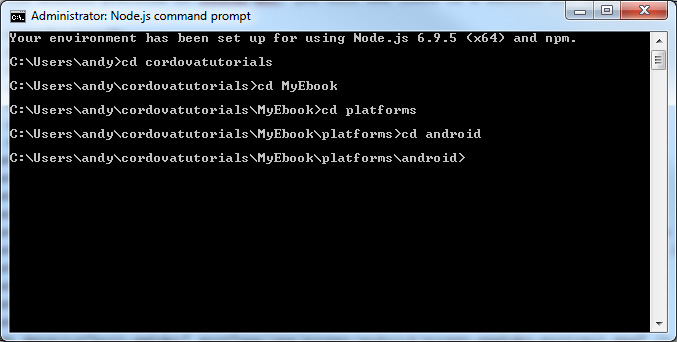
Once the sign key has been successfully created. We can now start build and publish our ebook app. Open your NodeJs command and go to the folder of your ebook app. We then need to go to platforms/android folder. Then we need to do the following actions.
1. Clean the app project.
We clean the app project by running the following command. Please make sure you are in platforms/android folder.
cordova clean
2. Build the app in release mode.
Once the project has already been cleaned, we can now build the project in release mode. Please type in the following command. This will build the apk file.
cordova build --release
3. Sign the app.
We sign the app by using the keystore we created before. Please make sure the location of the keystore and output of the apk file (in step 2) is correct. Otherwise you will get a file not found error. Once you run this, you will be prompted to enter your keystore password. If the password is match your app will be signed.
jarsigner -verbose -sigalg SHA1withRSA -digestalg SHA1 -keystore C:\Users\andy\cordovatutorials\myebook\com.bytutorial.ebooktutorial.keystore C:\Users\andy\cordovatutorials\myebook\platforms\android\build\outputs\apk\android-release-unsigned.apk com.bytutorial.ebooktutorial
4. Zipalign the apk.
The zipalign tool is used to optimize your apk files. The purpose of this is to ensure all uncompressed data starts with a particular alignment relative to the start of the file. This will be a benefit for reduction in amount of RAM consumed when running the application. You can run the zipalign by using the following command.
zipalign -v 4 C:\Users\andy\cordovatutorials\myebook\platforms\android\build\outputs\apk\android-release-unsigned.apk C:\Users\andy\cordovatutorials\myebook\com.bytutorial.ebooktutorial.apk
I hope this quick tutorial helps you. In the future, I will include another article on how to integrate Google Admob so you can get some revenues from ads. I have included the download files below. Please note: I only include the www folder, keystore files, config.xml and password keystore file for you to run and test. You can copy this zip file and paste them on first part of tutorial files. Drop me a message below if you have any question.