Before we started, I assume you have Visual Studio installed on your computer. The current version of Visual Studio I used on this example is version 2012. If you have earlier version you may have to upgrade to the same version or higher. I would recommend you to download the 2015 community version.
To create a module plugin, we need to have a running DNN site on your computer, if you do not have one, I would recommend you to install the DNN and setup it on your IIS local server. If you do not know how to do this, please see our tutorial on how to install DNN on your IIS.
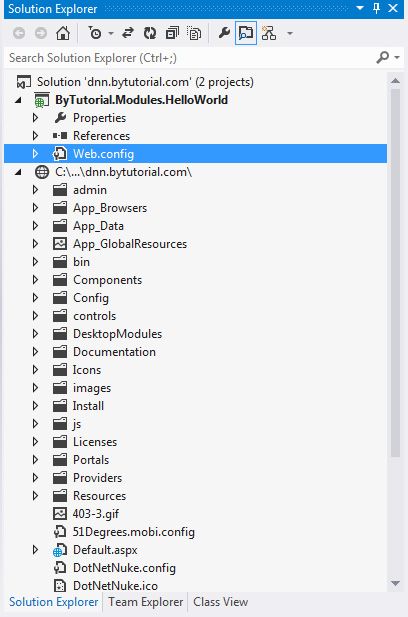
Once the DNN installed, open your Visual Studio program, under the File menu choose open Web site. Once the website has been opened, you can now create a new empty project.
Remember the type of the project has to be an empty website project to save time. Take a note as well that you need to place this project inside the DesktopModules folder so when you refer to this module you don't have to copy your module across.
The next step is to delete the web.config, we do not need this file to be included in the project.
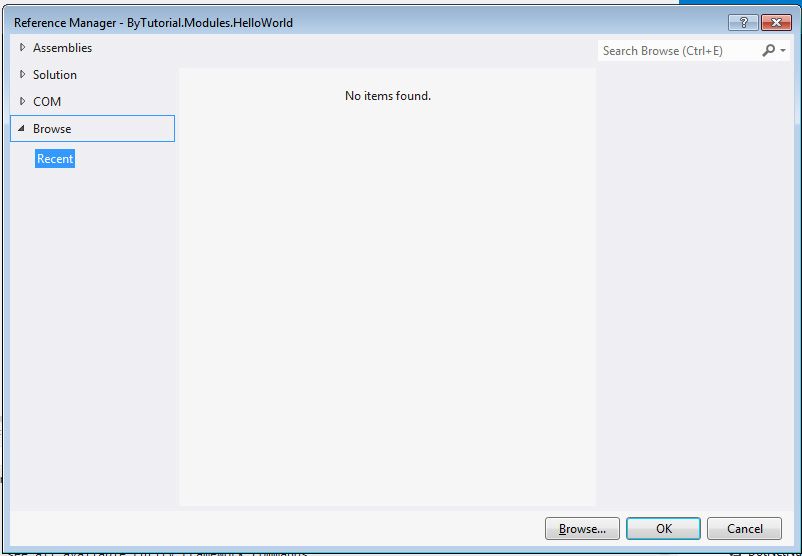
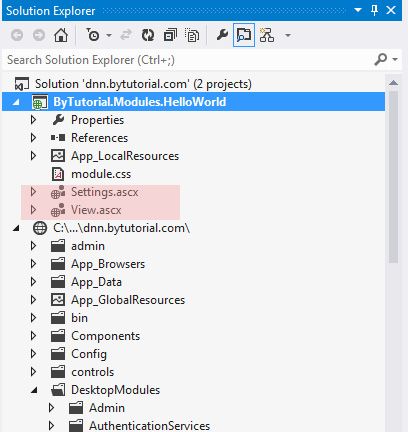
In order for the module to work, we need to add the DotNetNuke reference into our project. Under the references in the Solution explorer, right click and choose Add reference.
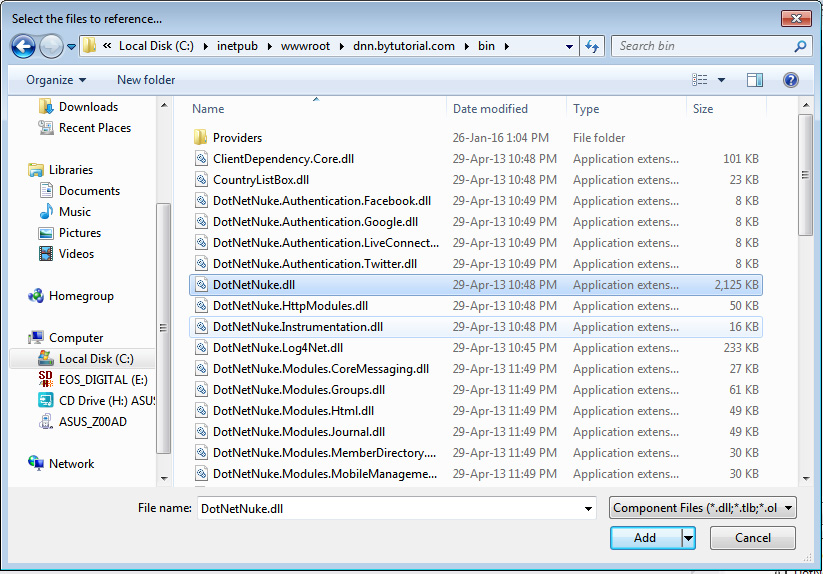
Click the browse button and allocate the DotNetNuke.dll file, this file is located in the bin folder on your site root path.
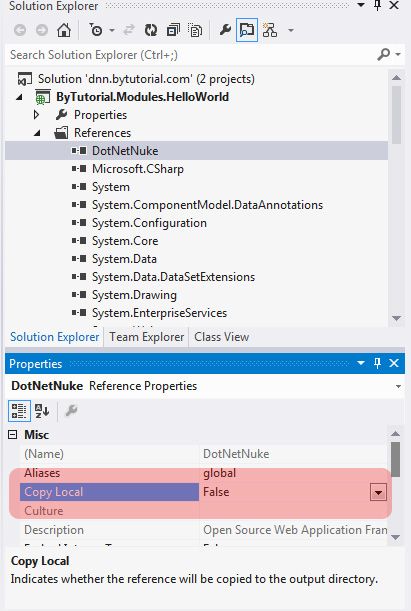
Once this has been added, we have to make sure the when we build the project, we do not want to copy this DotNetNuke.dll reference across, as we want to make our module compatible to other version, otherwise if you copy across, you may break the site due to the wrong version of the dll. So please set Copy Local to false.
We need to add two user controls (.ascx files). One is for View screen and the other is for the Setting screen.
This will be the code for the View.ascx file.
<%@ Control Language="C#" AutoEventWireup="true" CodeBehind="View.ascx.cs" Inherits="ByTutorial.Modules.HelloWorld.View" %>
<p>Hello World <asp:Literal ID="litYourName" runat="server" /></p>
This will be the code for the View.ascx.cs file. One thing you have to remember that every time you create a module view screen, you always have to inherit it from PortalModuleBase . This inherit base class is referenced from DotNetNuke.Entities.Modules. The built in keyword Settings are used to get the value of stored in the module settings.
using System;
using System.Collections.Generic;
using System.Linq;
using System.Web;
using System.Web.UI;
using System.Web.UI.WebControls;
using DotNetNuke.Entities.Modules;

namespace ByTutorial.Modules.HelloWorld {
    public partial class View : PortalModuleBase {
        protected void Page_Load(object sender, EventArgs e) {
            if ((string)Settings["YourName"] != null) {
                litYourName.Text = (string)Settings["YourName"];
            }
        }
    }
}
This will be the code for the Settings.ascx file. If you see on the following code, you can see that I use the DNN control named LabelControl. This control is used to display the text based on the resources languages specified in the App_Resources folder.
<%@ Control Language="C#" AutoEventWireup="true" CodeBehind="Settings.ascx.cs" Inherits="ByTutorial.Modules.HelloWorld.Settings" %>
<%@ Register TagPrefix="dnn" TagName="Label" Src="~/controls/LabelControl.ascx" %>

<div class="row">
    <label><dnn:Label id="lblYourName" runat="server" Text="Your Name" /></label>
    <asp:TextBox ID="txtYourName" runat="server" />
</div>
This will be the Settings.ascx.cs file. When creating a setting for your dnn module. You have to inherit from this class ModuleSettingsBase. Then you will need to override two abstract methods which are LoadSettings and UpdateSettings.
using System;
using System.Collections.Generic;
using System.Linq;
using System.Web;
using System.Web.UI;
using System.Web.UI.WebControls;
using DotNetNuke.Entities.Modules;
using DotNetNuke.Services.Exceptions;

namespace ByTutorial.Modules.HelloWorld {
    public partial class Settings : ModuleSettingsBase {
        public override void LoadSettings() {
            try {
                if (!Page.IsPostBack) {
                    //Make sure we check if the setting YourName is exists if it is exists then we display the value
                    if ((string)TabModuleSettings["YourName"] != null) {
                        txtYourName.Text = (string)TabModuleSettings["YourName"];
                    }
                }
            } catch (Exception exc) {
                //If error occurs, save it in event viewer
                Exceptions.ProcessModuleLoadException(this, exc);
            }
        }

        //override the UpdateSettings module
        public override void UpdateSettings() {
            try {
                ModuleController objModules = new ModuleController();
                //Update a setting YourName value
                objModules.UpdateTabModuleSetting(TabModuleId, "YourName", txtYourName.Text);
            } catch (System.Exception exc) {
                //If error occurs, save it in event viewer
                Exceptions.ProcessModuleLoadException(this, exc);
            }
        }
    }
}
Once the above codes have been placed, the next step is to create resources file. The resources files are used to stored the text for labelling. In this example we only need to use for Settings resource only. What you need to do is to create App_LocalResources folder and create a file name Settings.ascx.resx which represent the Settings.ascx file itself. You will notice that we match the label ID name into our Settings.ascx file, as the module will search automatically by referring to the ID of the dnn label control.
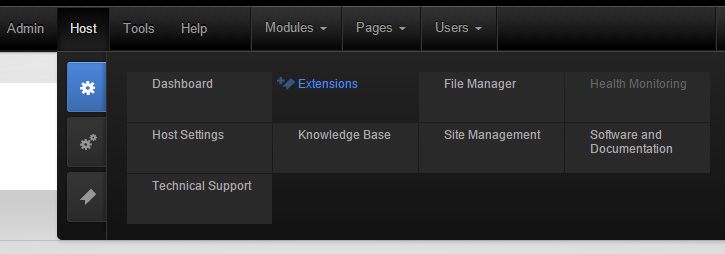
The codes part of the module are now done, the remaining job is now to create a dnn extension on your site to test this module. In order to create a new extension, you will need to login as Super User account. This is the highest level super user account and only by using this account you can get the access to the host > extensions menu.
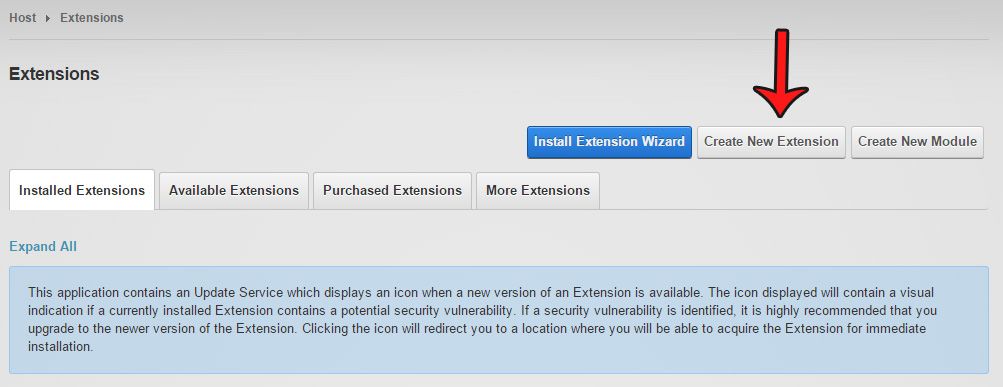
Once in the module extensions page, please click the Create New Extension button.
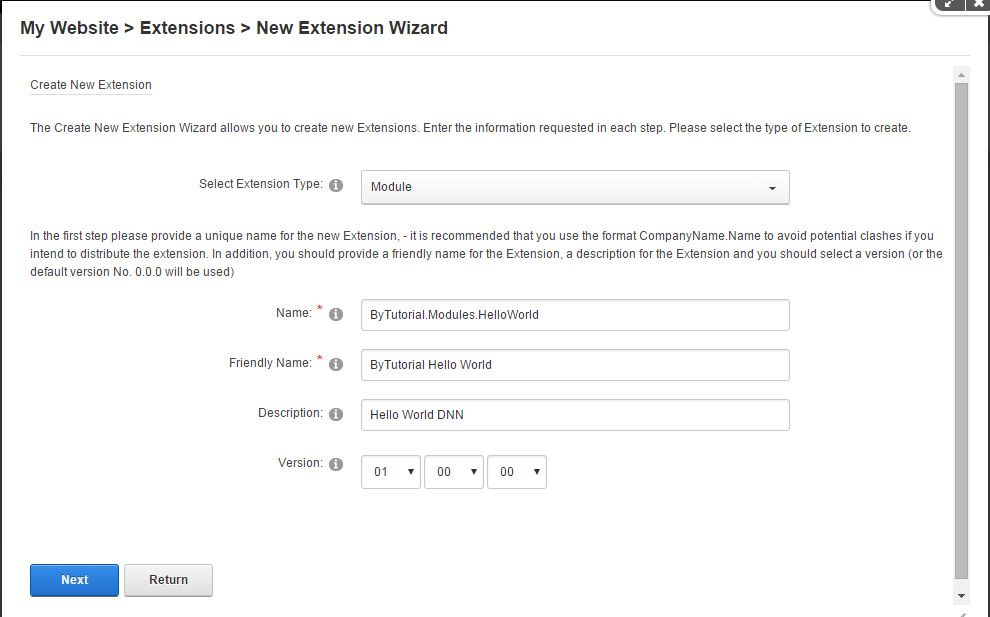
A popup window will be displayed. Please choose the extension type to Module and enter your module information. One thing to remember that the Module name has to be unique, it is recommended that you include your company name or domain name to make it unique.
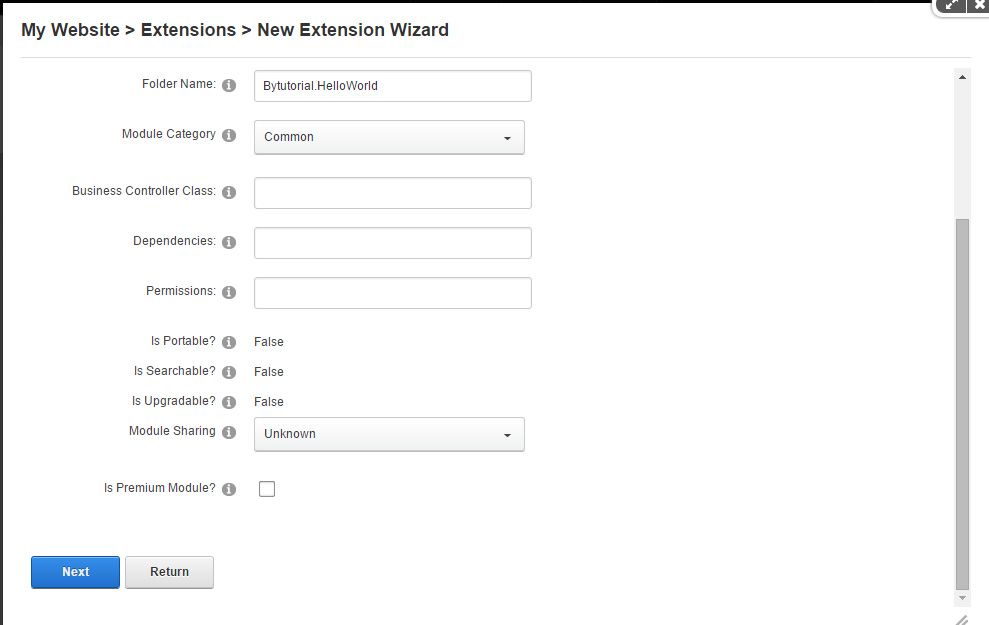
The next wizard step is to set the module information. Please make sure you enter the correct folder name, you can double check this inside the desktopmodules folder. For the Module category, you may want to place this in the Common category if it will be used frequently or if it is only available for Admin use only, you may select this option. Do not worry about the remaining fields, you may leave them as it is, there is help text icon which explain further what they are used for.
The next screen wizard is to enter your company or module creator information.
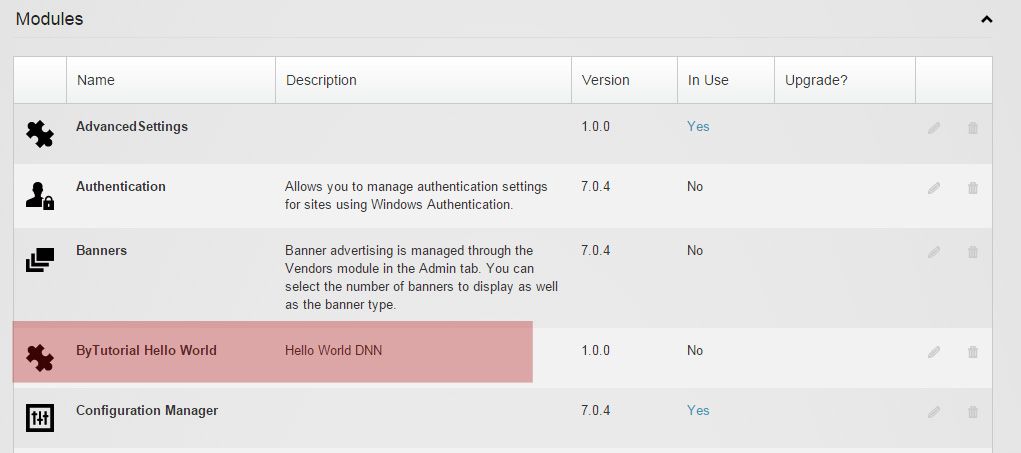
The wizard is now completed, you should see your module creation in the extension list like below.
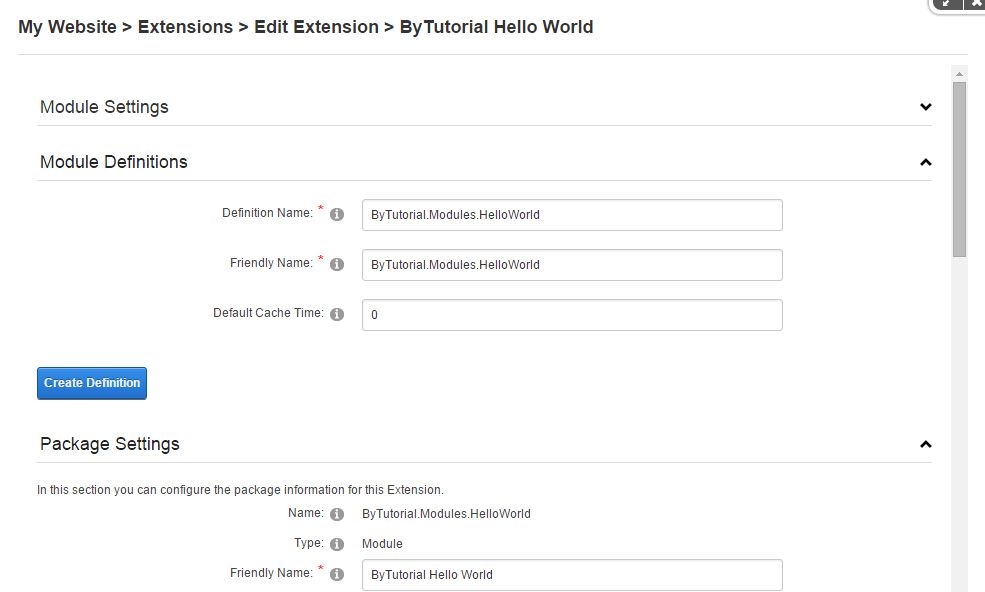
We haven't linked our two controls to the module. In order to do this we have to create a new module definition of the module. In the module extensions list which above image, click the edit pencil button, this will edit the module information. Under the Module definitions section, please click Add Definition button. Then enter the module definition and friendly name. Usually you enter the same Module name in here.
Once the definition has been created, we can now add our module controls. Please click the Add Module control button.
We add the View control information. There is a key text box, this is only be used if we select the control type as Edit type, for the View type, we will leave it blank. The difference between View and Edit type is the View type is only used for View only while the Edit can be used for Edit the module settings. Edit in here can be considered as internal access settings. So it might be not accessible by public use. There is a Module title, this title is used by the module container that wrap the module control.
Once the view control has been added, we repeat the process to add the Settings control. For the settings control, we set the Key value to Settings and the type to Edit.
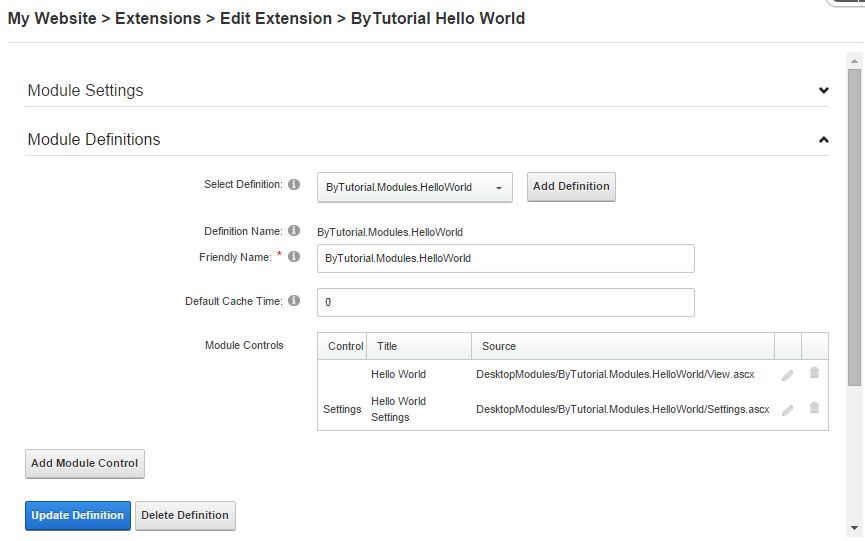
You should now see the list of your control files listed in the module definition.
The final step is now to build your module. Firstly make sure it is in the release mode and click Build. Once it has been built. Go to your DNN website bin folder and right click to Add reference. Please browse the dll file from your new Hello World Project. Once it is added, we are completely done.
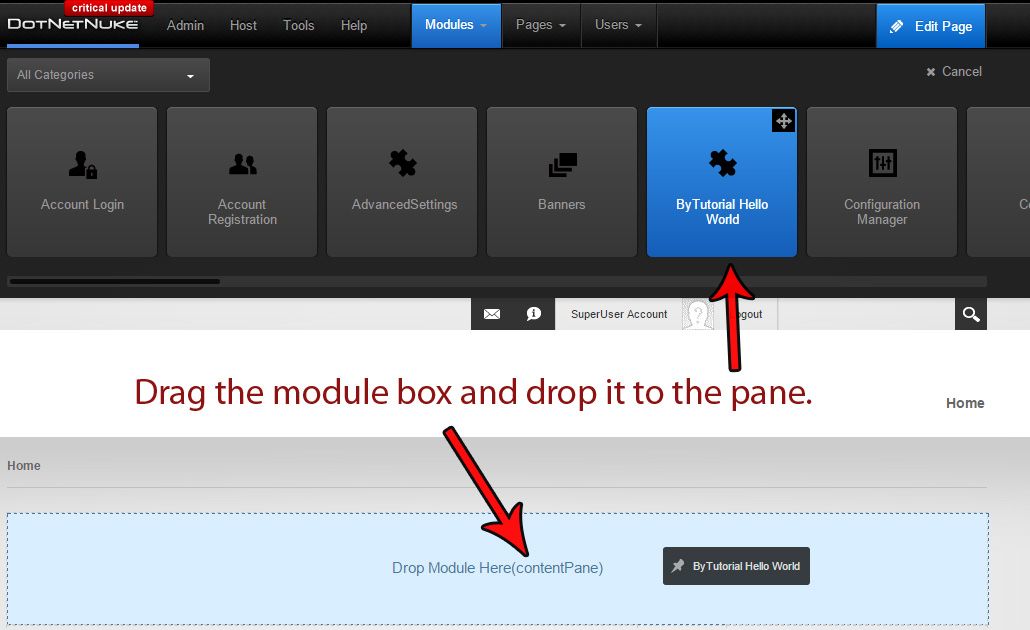
We can now try our simple Hello World module. To do this please go to the page where you want to add this module. Under the Modules menu, there is Add New Module menu. A scrolling list of DNN extension modules will be listed. Select the Hello World DNN module then drag it and drop it to the module pane. This will install the module into the page.
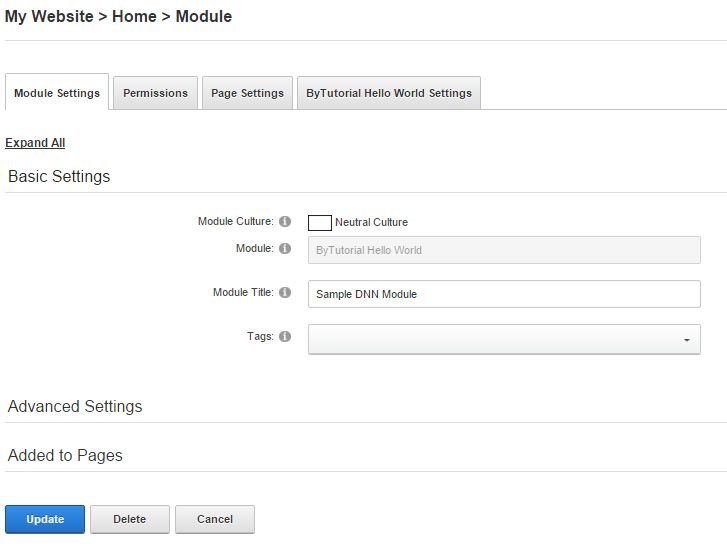
Once the module has been installed to a page, your new module should be display like below.
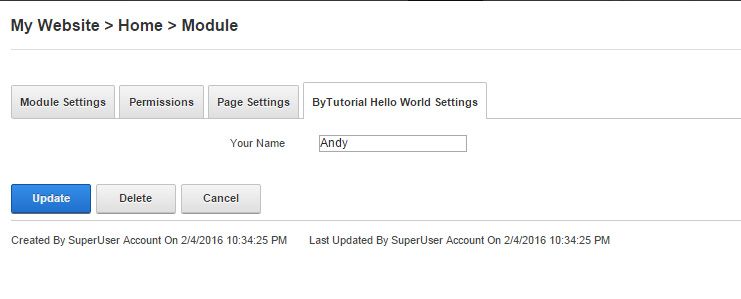
Click the module setting, and you should be able to set some information to your new module. In below example,we will set the module title and your name value.
This will be the final result after you set the module title and setting name value.
How to package your module?
You can package your module so it can be installed to any website you want. To package a module you will need to create a dnn manifest file. It can be just a txt file, but you need to rename the extension to .dnn. Here is the code of the manifest file.
<dotnetnuke type="Package" version="5.0">
  <packages>
    <package name="ByTutorial.Modules.HelloWorld" type="Module" version="1.0.0">
      <friendlyName>ByTutorial Hello World</friendlyName>
      <description>Hello World DNN</description>
      <owner>
        <name>bytutorial.com</name>
        <organization>bytutorial.com</organization>
        <url>https://bytutorial.com</url>
        <email>info@bytutorial.com</email>
      </owner>
	  <license src="license.txt" />
      <releaseNotes src="releasenotes.txt" />
      <components>
        <component type="Module">
          <desktopModule>
            <moduleName>ByTutorial.Modules.HelloWorld</moduleName>
            <foldername>ByTutorial.Modules.HelloWorld</foldername>
            <businessControllerClass></businessControllerClass>
            <supportedFeatures />
            <moduleDefinitions>
              <moduleDefinition>
                <friendlyName>ByTutorial.Modules.HelloWorld</friendlyName>
                <defaultCacheTime>0</defaultCacheTime>
                <moduleControls>
                  <moduleControl>
                    <controlKey></controlKey>
                    <controlSrc>DesktopModules/ByTutorial.Modules.HelloWorld/View.ascx</controlSrc>
                    <supportsPartialRendering>False</supportsPartialRendering>
                    <controlTitle>Hello World</controlTitle>
                    <controlType>View</controlType>
                    <iconFile></iconFile>
                    <helpUrl></helpUrl>
                    <viewOrder>0</viewOrder>
                  </moduleControl>
                  <moduleControl>
                    <controlKey>Settings</controlKey>
                    <controlSrc>DesktopModules/ByTutorial.Modules.HelloWorld/Settings.ascx</controlSrc>
                    <supportsPartialRendering>False</supportsPartialRendering>
                    <controlTitle>Hello World Settings</controlTitle>
                    <controlType>Edit</controlType>
                    <iconFile></iconFile>
                    <helpUrl></helpUrl>
                    <viewOrder>0</viewOrder>
                  </moduleControl>
                </moduleControls>
              </moduleDefinition>
            </moduleDefinitions>
          </desktopModule>
        </component>
		<component type="Assembly">
          <assemblies>
            <assembly>
              <path>bin</path>
              <name>ByTutorial.Modules.HelloWorld.dll</name>
            </assembly>
          </assemblies>
        </component>
        <component type="ResourceFile">
          <resourceFiles>
            <basePath>DesktopModules/ByTutorial.Modules.HelloWorld</basePath>
            <resourceFile>
              <name>Resources.zip</name>
            </resourceFile>
          </resourceFiles>
        </component>
      </components>
    </package>
  </packages>
</dotnetnuke>
This will be the package folder. Note: we add two extra files which are the license.txt and releasenotes.txt. You can add information of your module on those files. Once you set the package folder correctly and match with your manifest dnn file, you can zip it named it accordingly. In our example we just name the installation package as ByTutorial.Modules.HelloWorld_FullInstall_v1.0.0.zip. Once this has been zip you can distribute your module and let them install via Host > Extensions page. If you want to find out how to install this module, you can check our article in How to install DNN extension.
Inside the package folder you will notice there is resources.zip file, this file holds the control files, app_localresources and other related files.
Download Demo Files
Hope this tutorial helps, if you have any question, please drop your question in below comment.


