In this tutorial, we are going to learn how to bind an array object into an HTML select. We also going to learn how to store the selection of the select value into a VueJS model entity.
Here is the full source code of the HTML and Javascript.
<!doctype html>
<html>
<head>
<title>bytutorial.com - Vue Select Binding</title>
</head>
<body>
<div id="app">
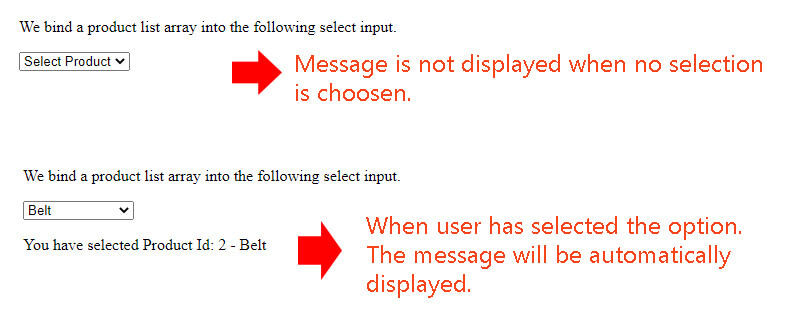
<p>We bind a product list array into the following select input.</p>
<select v-model="selectedValue" v-on:click="showResult()">
<option value="">Select Product</option>
<option v-bind:key="product.productId" v-for="product in productList" v-bind:value="product.productId">{{ product.productName }}</option>
</select>
<p></p>
<div v-if="message != ''">{{message}}</div>
</div>
</body>
<script src="https://cdn.jsdelivr.net/npm/vue@2/dist/vue.js"></script>
<script>
var app = new Vue({
el: '#app',
data: {
productList: [],
selectedValue: "",
message: ""
},
methods: {
showResult(){
this.message = "";
if(parseInt(this.selectedValue) > 0){
this.message = "You have selected Product Id: " + this.selectedValue + " - " + this.getProductName(this.selectedValue);
}
},
getProductName(id){
for(var i = 0; i < this.productList.length; i++){
if(this.productList[i].productId == id){
return this.productList[i].productName;
}
}
return "";
}
},
mounted(){
this.productList.push({productId: 1, productName: "Wallet"});
this.productList.push({productId: 2, productName: "Belt"});
this.productList.push({productId: 3, productName: "Pants"});
this.productList.push({productId: 4, productName: "Tshirt"});
}
});
</script>
</html>
We declared 3 data variables which are:
- productList Variable
This variable will hold an array of product objects. The product object will have two field properties. The first field will be the product id and the second one will be the product name.
- selectedValue Variable
This variable will be used to store the selected value of the select box. By default, it will be set to an empty string.
- message Variable
This variable will display a message to notify the user of the product selection made by the user. By default, it will display an empty message when no selection is made.
If you notice in the code. We use the mounted method. This predefined method is called when the VueJs reactive components and templates are rendered in DOM. In this method call, we inserted a list of product objects into the productList data variable. If you have a look into the following code.
<select v-model="selectedValue" v-on:click="showResult()">
	<option value="">Select Product</option>
	<option v-bind:key="product.productId" v-for="product in productList" v-bind:value="product.productId">{{ product.productName }}</option>
</select>
In the second option value, we bind the key and value against the productId. We also use the v-for directive to inserting the product information in a loop. In the select input itself, we add a model directive and an event click handler that will show a message to the user based on the user's selection.
If you have a look into the message code section. We only render or display the message if the message is not empty.
<div v-if="message != ''">{{message}}</div>
In the methods section. We declare two methods. The first method showResult will be used to set the message variable according to our product selection. While the getProductName method will be used to return the product name by passing the productId that is retrieved from the selectedValue model.
Demo
To see the live demo, you can click the following link.
See Vue Select Binding in action.
Download
To download the demo file. Please click the following URL link.